
Why Microgreens Get Moldy and How to Prevent It
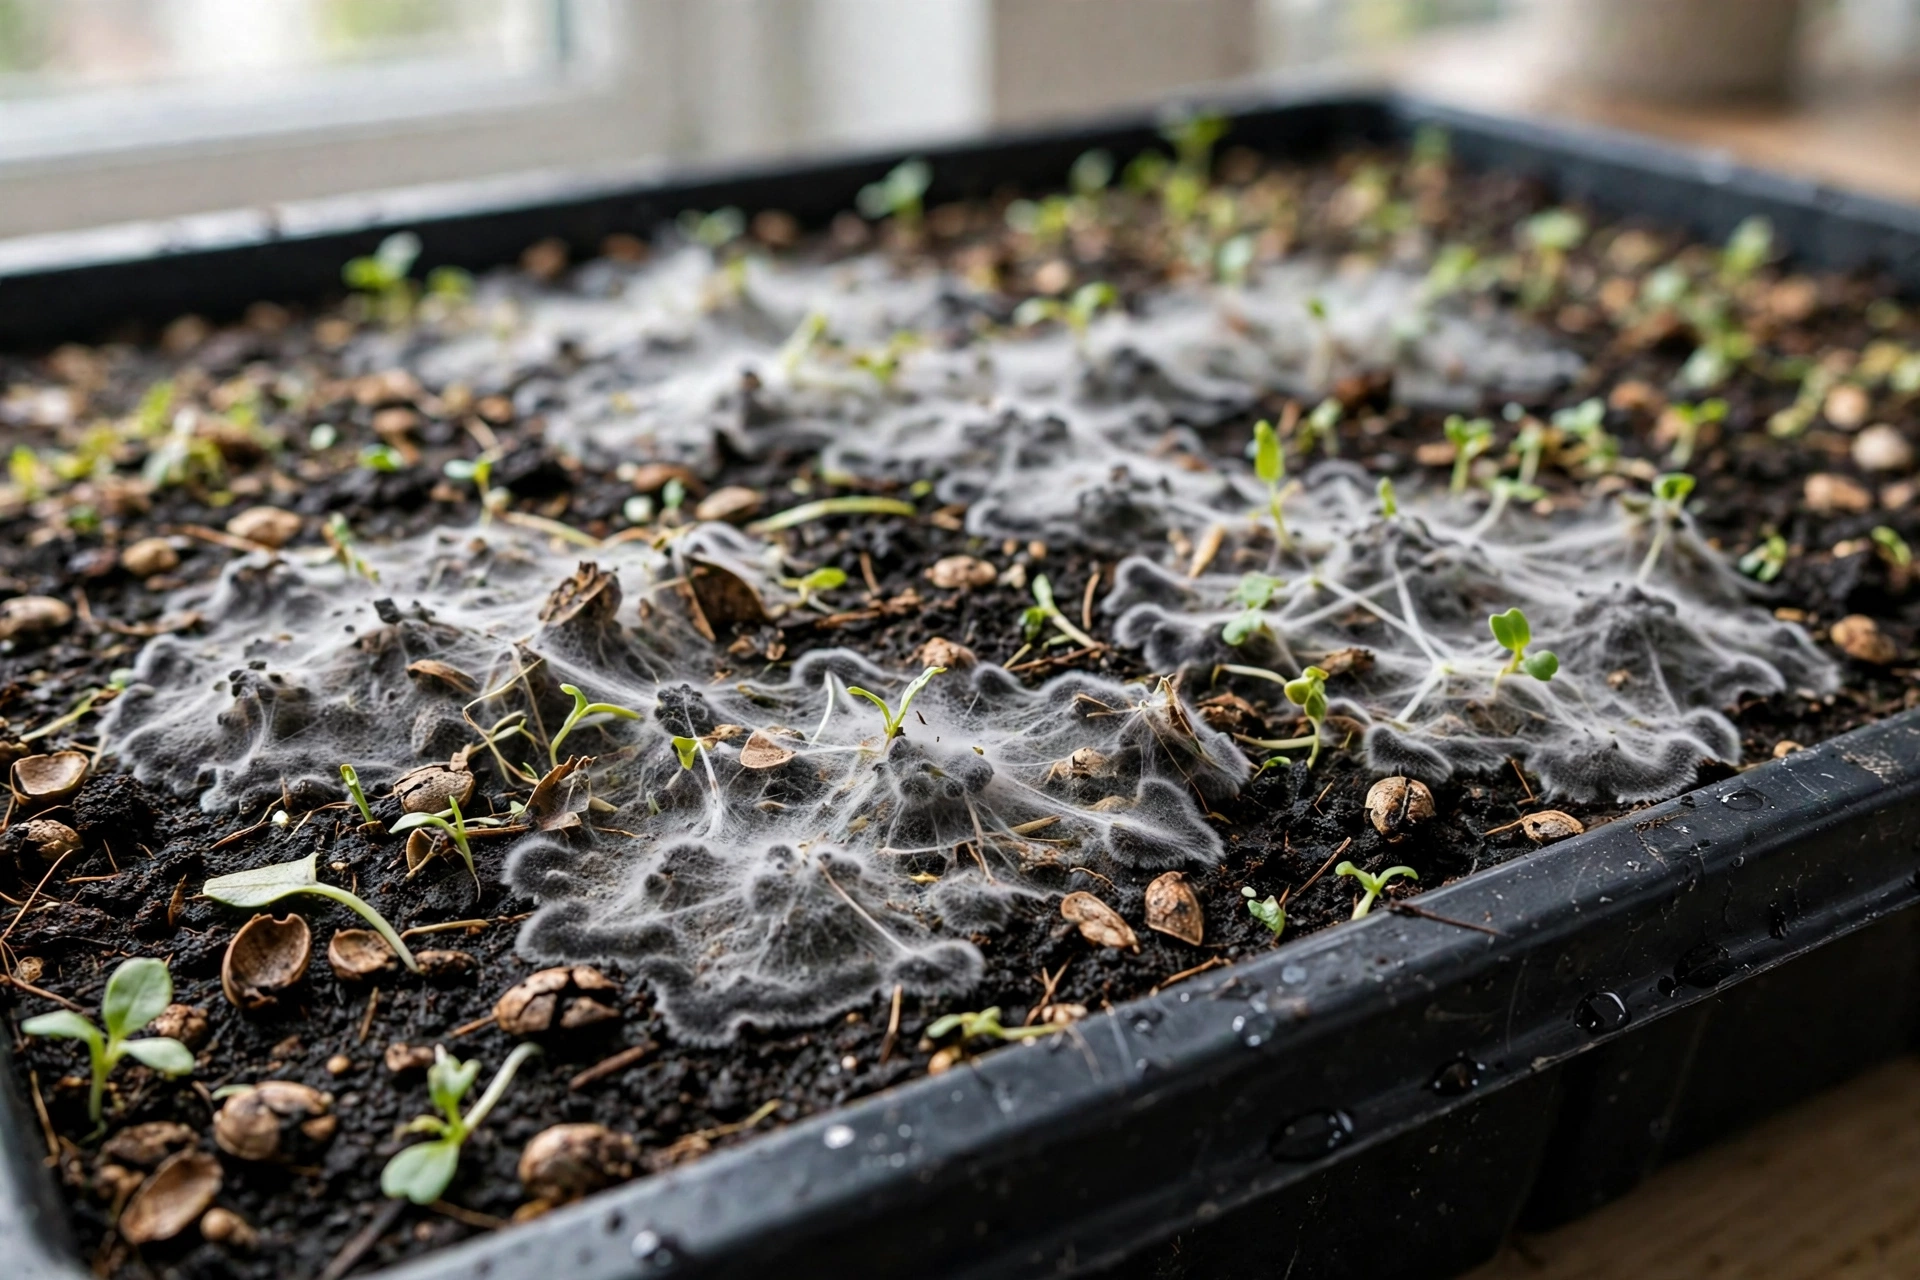
Most white fuzz on a young tray is not mold at all. It is root hairs, and the tray is fine. Real mold is the other white growth. It looks webby, it spreads in patches, and it shows up when a tray stays wet in still air for a few quiet days. This page sorts the two apart, walks through the five causes behind real mold, and ends with the one rule that never bends: if a tray is truly moldy, the whole tray goes.
Mold is rarely bad luck. It follows a short list of causes, and every one of them sits in your hands. Growers who run the same simple routine tray after tray mostly stop seeing it. Start by checking what is actually growing on your tray.
First, Is It Actually Mold?
Look closely at where the white growth sits. Root hairs grow on the plant. Mold grows on everything else as well: across the medium, over seed hulls, and up the stems. Purdue University Extension says it plainly in its home microgreens guide: root hairs emerging from the seed are normal, and mold is not. Brassica trays cause most of the confusion. Radish and broccoli seedlings both wear a thick white coat of root hairs around day 2 to 4, which is why our broccoli microgreens guide fields this question more than any other.
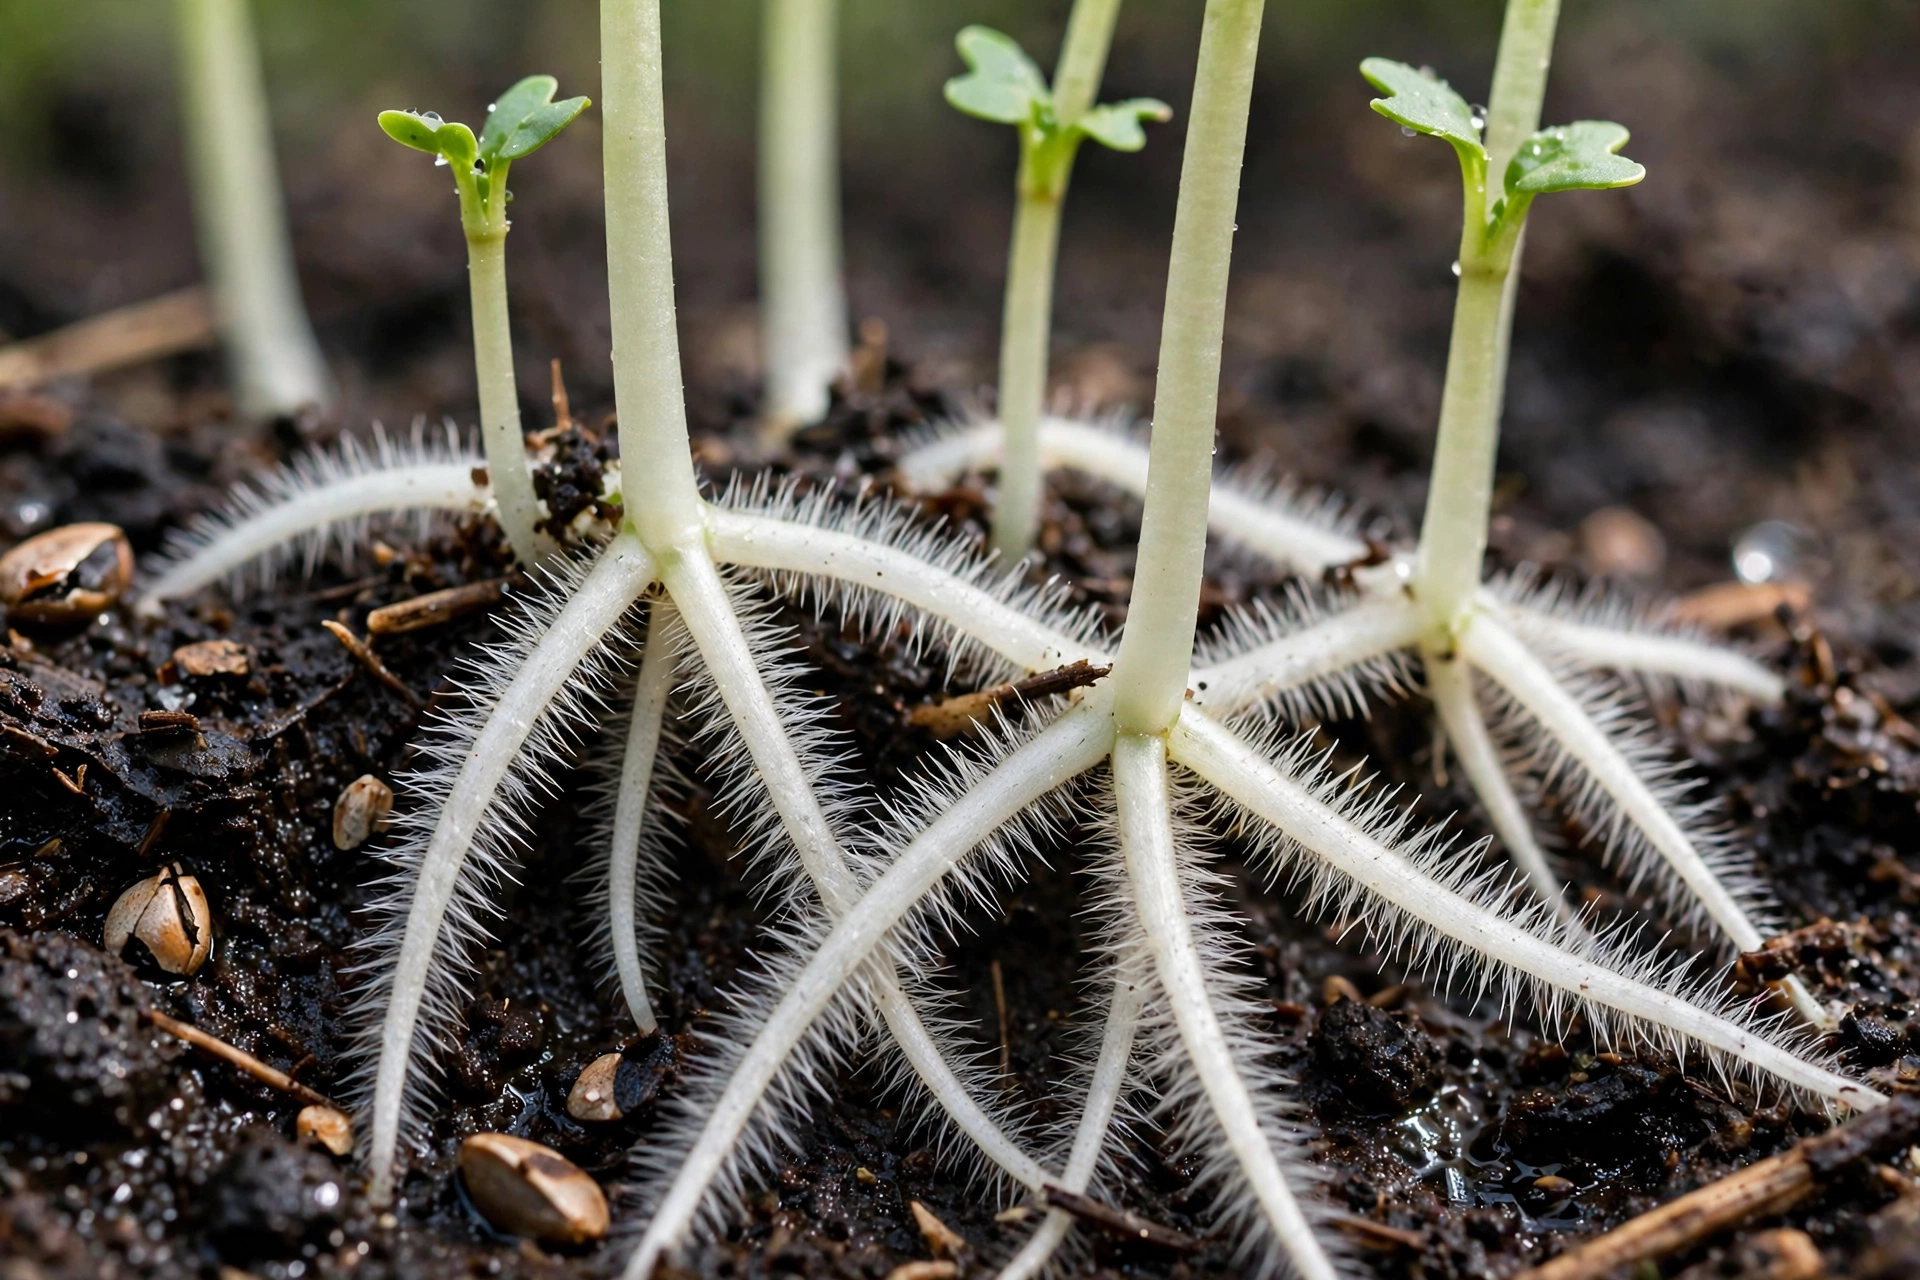
Run the four checks in this table before you decide anything.
| Check | Root hairs (harmless) | Mold (discard the tray) |
|---|---|---|
| Where it grows | On the roots and the lowest part of the stem only | On roots, stems, seed hulls, and bare medium alike |
| What it looks like | Fine, even, bright white fuzz, like tiny hairs standing up | Webby or cottony patches, often gray at the edges, spreading outward |
| After a light mist | Seems to vanish as the hairs flatten against the root | Still there. The web mats down but stays visible |
| Smell | Fresh, like soil and seedlings | Musty or sour, like a damp basement |
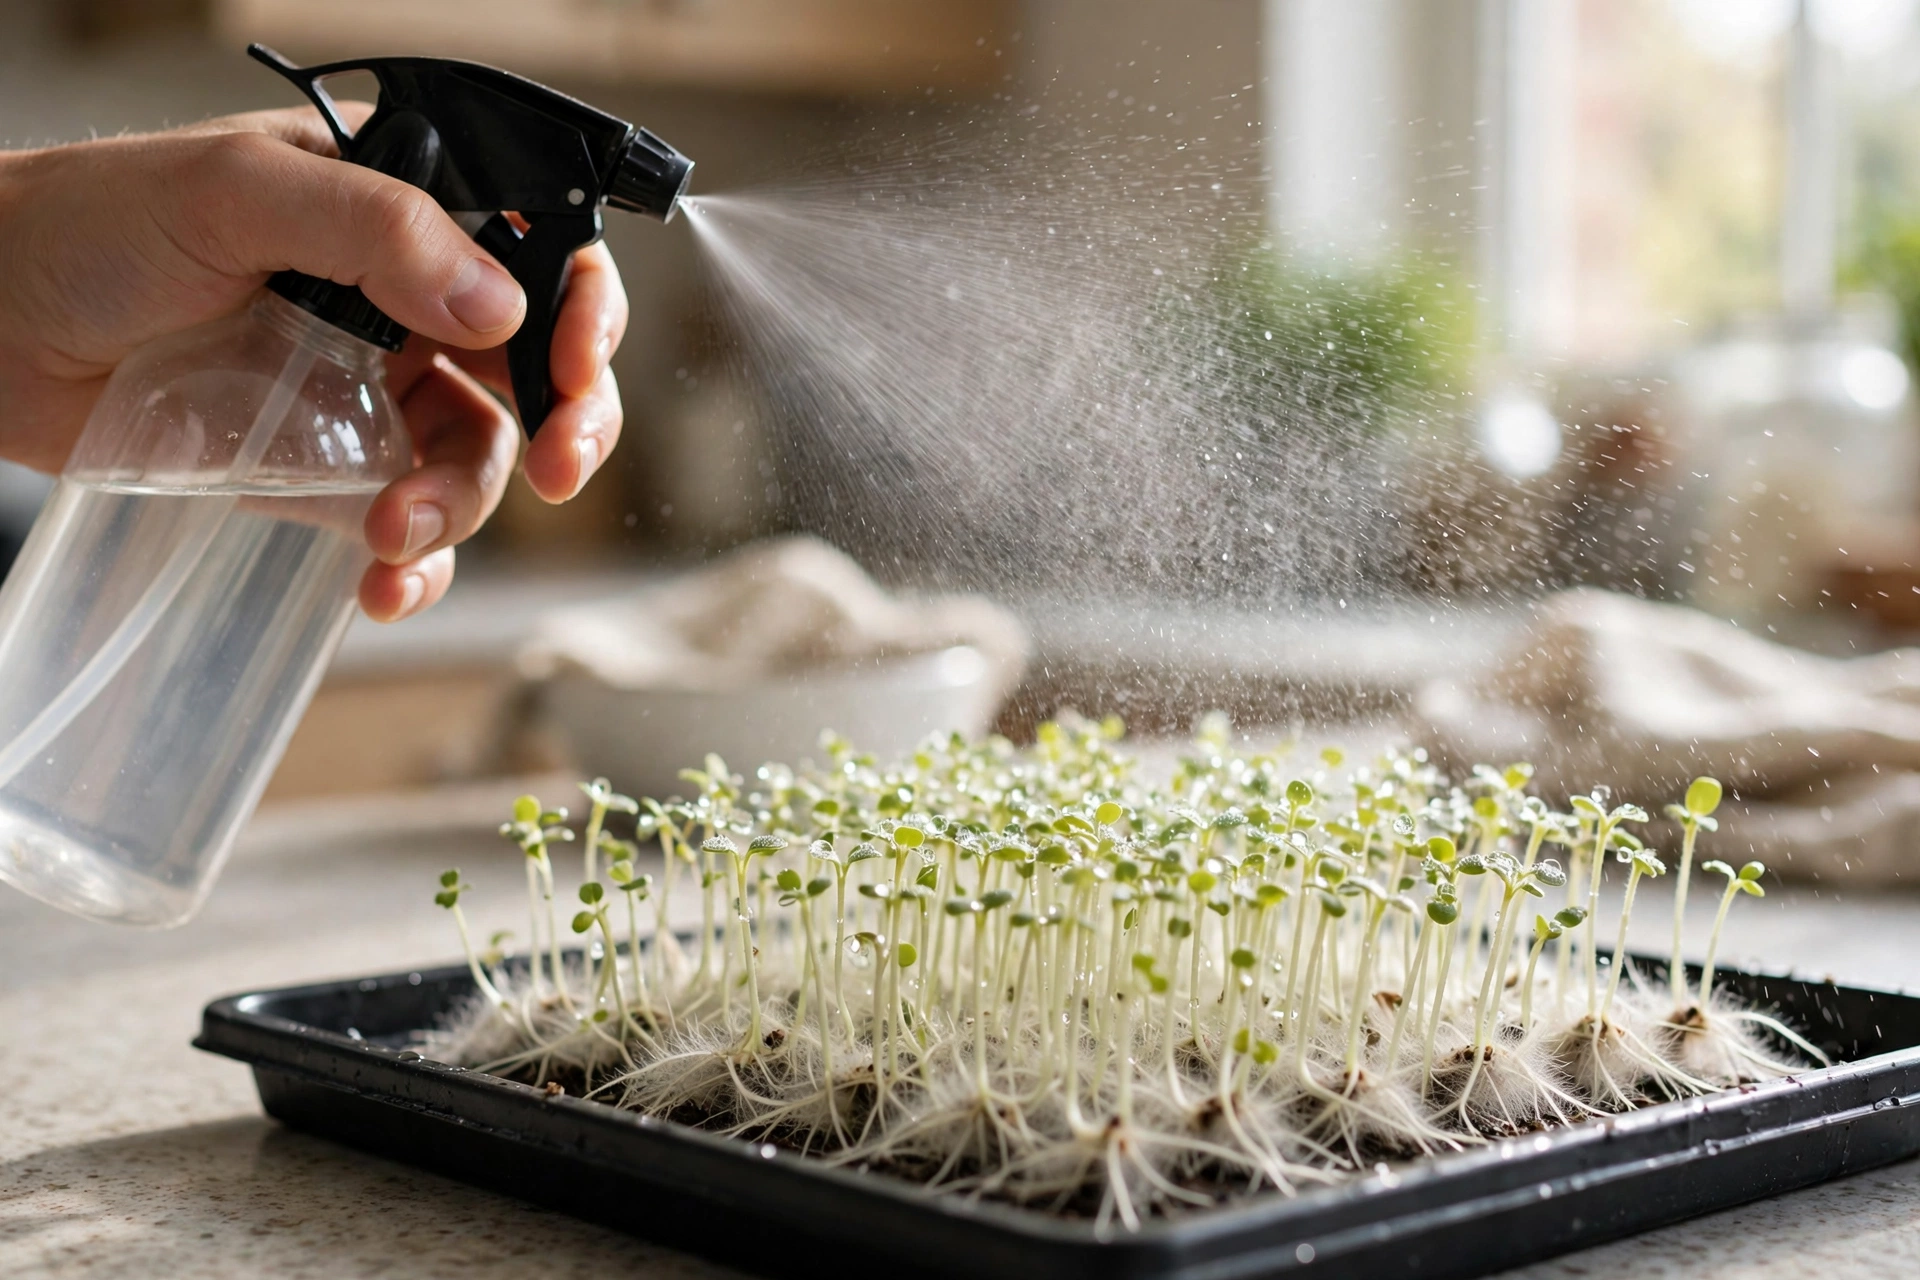
One check settles most trays. Mist the patch lightly with clean water. Root hairs flatten and seem to disappear. Mold stays put. If the growth is webby, spreading, or smells musty, stop testing and treat it as mold. The full side-by-side diagnostic, with a worked example, lives in telling root hairs from mold in our radish microgreens guide. This page keeps the short version on purpose. The bigger job here is why mold shows up at all.
Why Microgreens Get Moldy: The Five Causes
Mold spores ride the air and sit on most seed. You cannot keep them out of the kitchen. What you control is whether the tray hands them the warm, wet, still conditions they need. Almost every moldy tray traces back to one of these five causes, and usually to two of them stacked together.
Cause 1: Too much water, held too long
A freshly sown tray needs steady moisture. A soaked tray needs luck. Medium that stays soggy for days is an open invitation, because mold feeds happily in standing water long before seedlings suffer from it. The usual pattern is a heavy hand with the spray bottle after germination, when the crop no longer needs a wet surface. Fix it at the source. Pre-moisten the medium before sowing, mist only until the roots anchor, then move the water underneath the tray. If the surface glistens all day, the tray is too wet.
Cause 2: Still, stale air
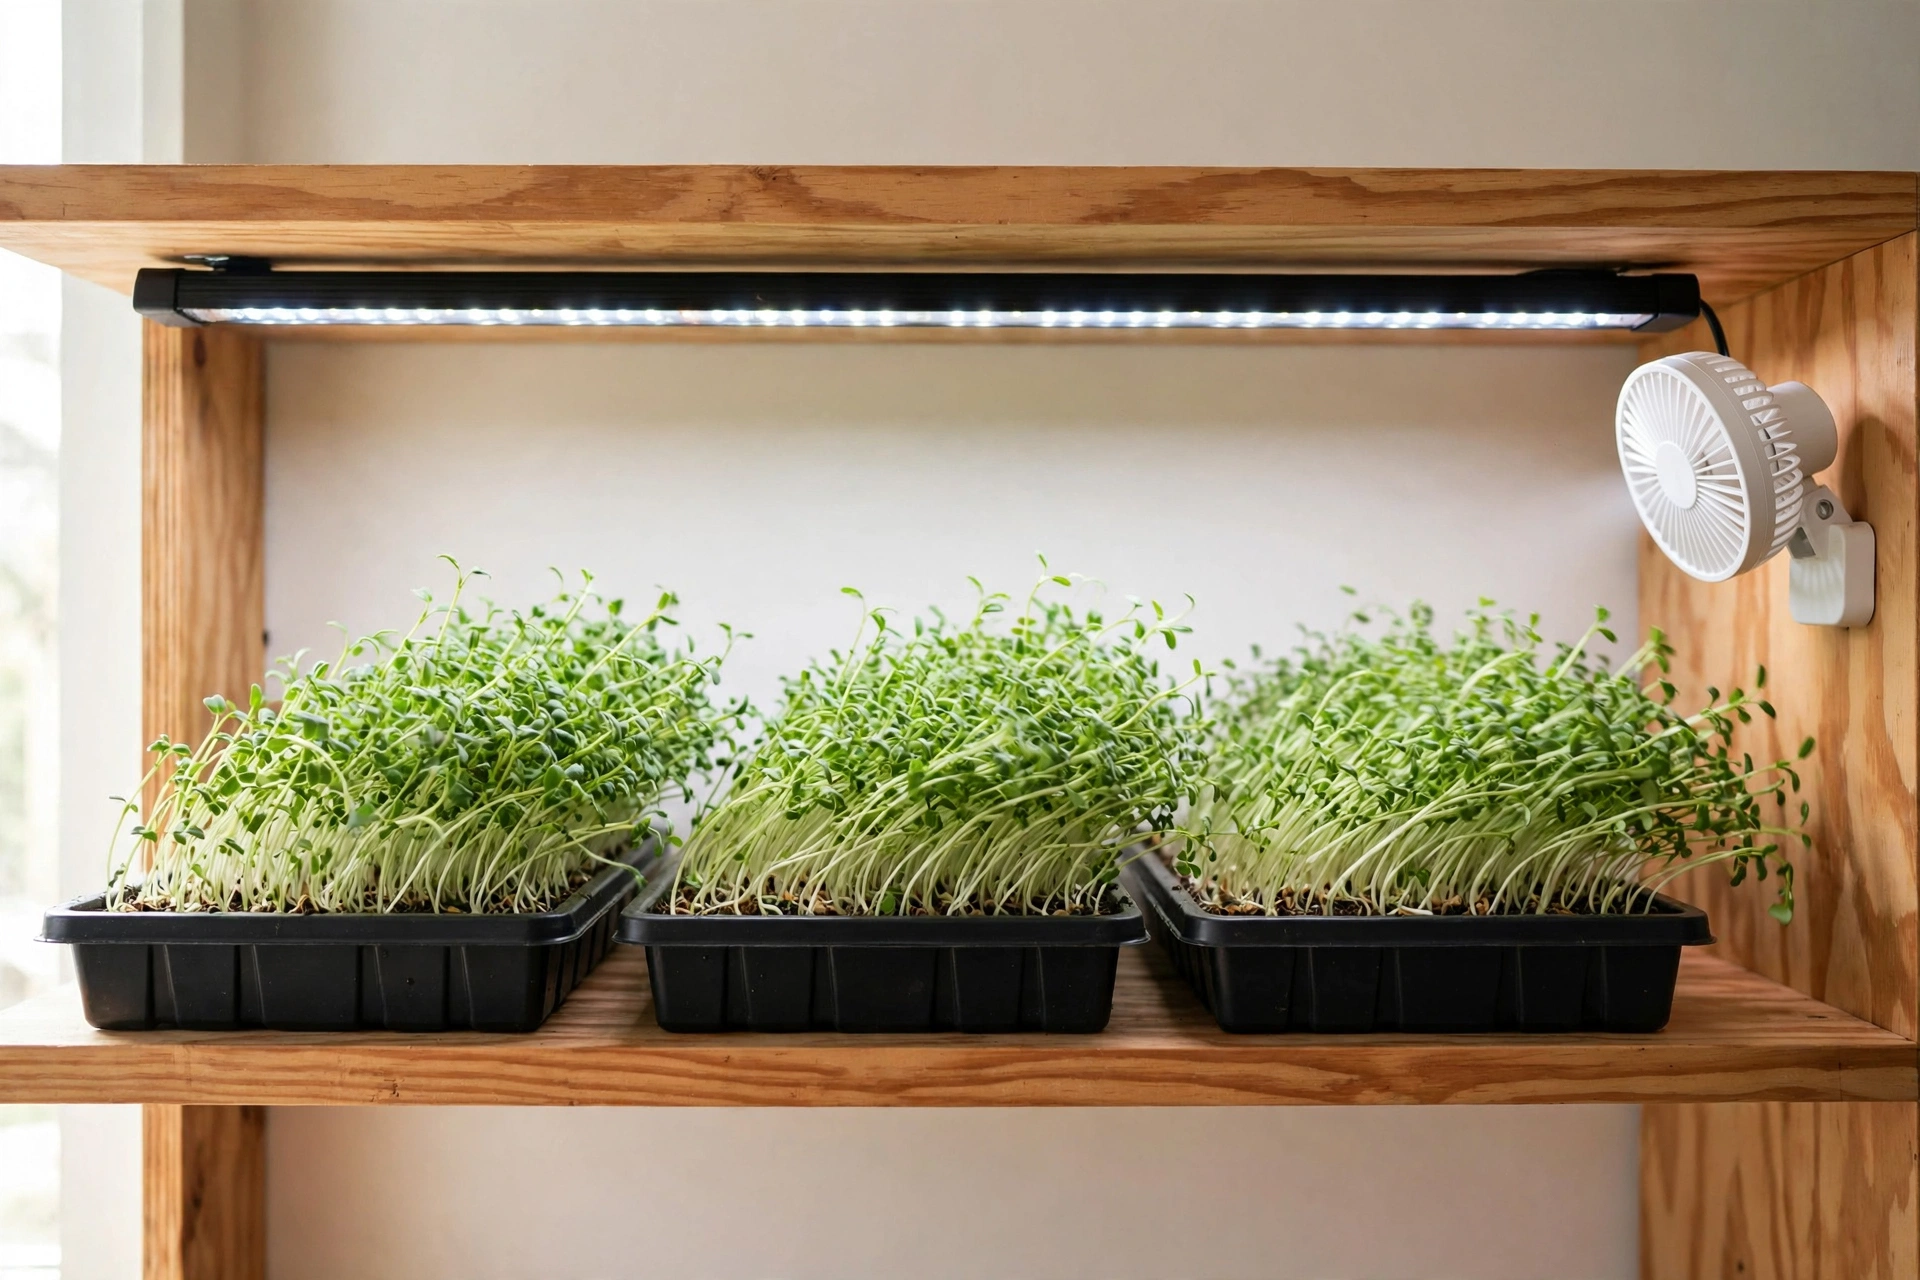
Mold loves air that does not move. A covered tray in a closed room holds a pocket of warm, humid air right at the surface, and that pocket is where patches start. Outdoors, the wind does this job for free. Indoors, nothing does it unless you set it up. A small fan on the shelf, running on low, breaks the pocket up and firms the seedlings at the same time. Trays pushed tight against a wall mold first. Give each tray a little space around it.
Cause 3: Seed sown too thick
A dense stand looks generous and grows trouble. Seeds piled on seeds hold moisture inside the pile, block airflow at the surface, and give mold a bridge from one seed to the next. The over-thick corner of an otherwise fine tray is where mold usually starts. Weigh your seed and sow at the rate meant for the crop and the tray size. Tiny seed is the worst offender because it pours in clumps, so sprinkle low and in two passes. An even layer dries evenly. A piled layer never does.
Cause 4: The cover stays on too long
The covered germination period is a mold incubator by design. It is dark, warm, and wet, which is exactly what seeds want and exactly what mold wants. The cover earns its place for the first 2 to 4 days while roots form. Left on past that point, it starts working against the tray. Uncover as soon as the young shoots lift the cover. Light and moving air from that moment on do more for the crop than another day of darkness. If a tray smells musty when you lift the cover, the cover stayed on too long.
Cause 5: Dirty trays, old medium, and tired seed
Spores survive between crops. A tray rinsed and put away damp carries the last crop’s mold into the next one, and medium reused from a moldy tray carries even more. Seed can bring spores in too, especially seed stored open in a humid room. Sunflower is the classic case, because its seed is soaked before sowing and soak water can turn into a spore soup; our sunflower microgreens guide covers that soak routine for exactly this reason. Start every crop clean: fresh medium, a washed and sanitized tray, and seed stored cool, dry, and sealed.
Damping-Off: The Mold Problem That Knocks Seedlings Over
Damping-off is the mold problem that does not look like mold at first. Seedlings that stood fine yesterday lie flat today, pinched thin and water-soaked at the soil line, as if the stem melted. A patch of the tray goes over at once, often in a rough circle. Soil fungi attack the stem right where it meets the medium, and they thrive in the same conditions as surface mold: wet medium, still air, and seed sown thick.
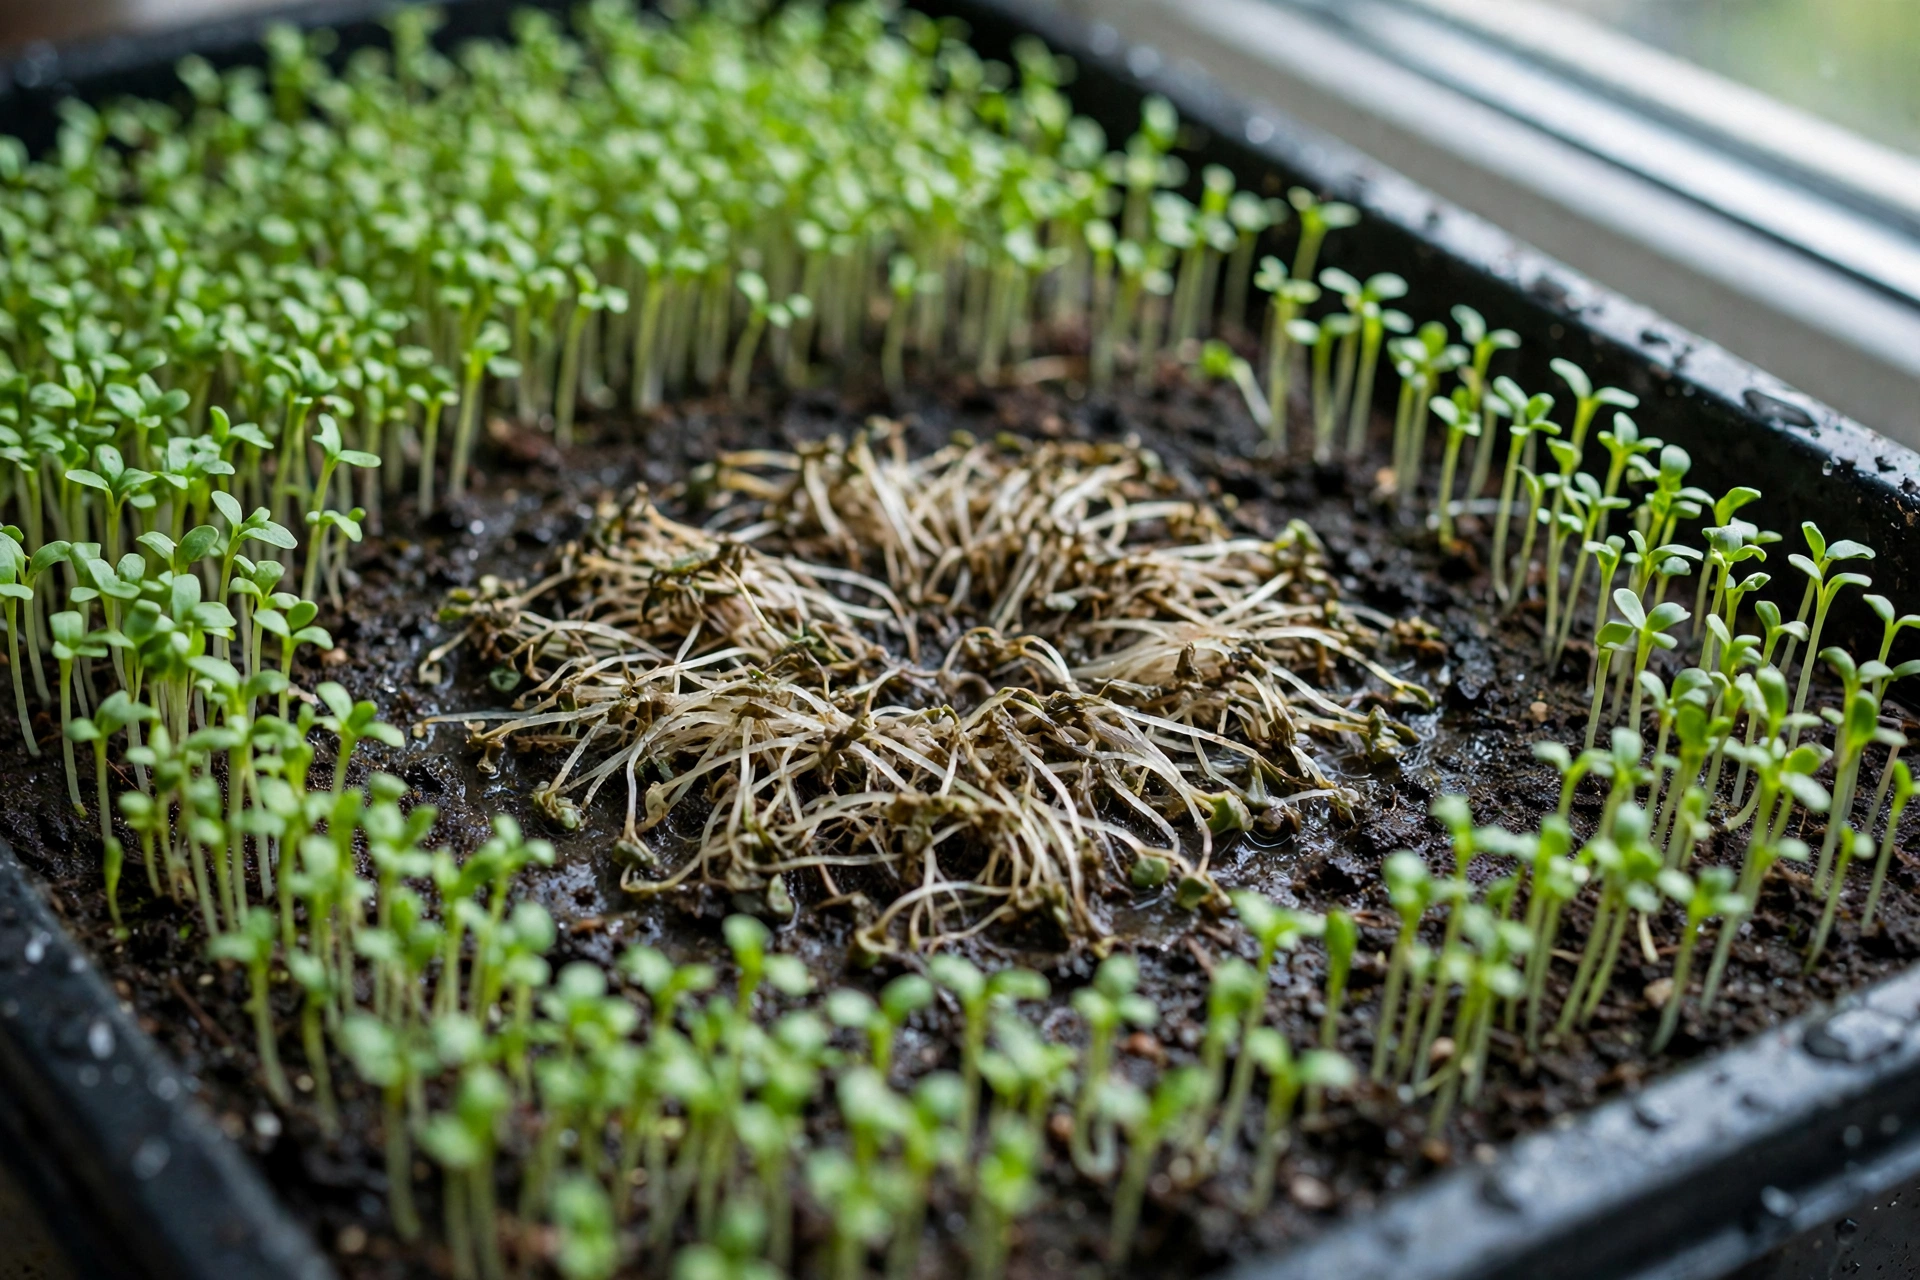
There is no fixing a seedling that has already collapsed. The stem is gone. Turn your attention to the next tray. Improve airflow, ease off the water, and uncover on time. If damping-off takes most of a young tray, compost the whole thing and start over with fresh medium and a sanitized tray. It moves fast, and a half-collapsed tray rarely grows into food worth eating raw. The prevention system below is the real answer, because damping-off and surface mold feed on the same tray conditions.
Found Mold on the Tray? What To Do
Say the checks point to real mold. The answer is short, and it does not change with the size of the patch.
Discard the whole tray. Do not cut around the patch. Do not wash the rest and eat it. Do not spray the tray and carry on. Mold spreads through a shared root mat and shared water long before it shows on the surface, and microgreens are eaten raw. A week of growing and a pinch of seed are cheap. Your stomach is not the place to save them.
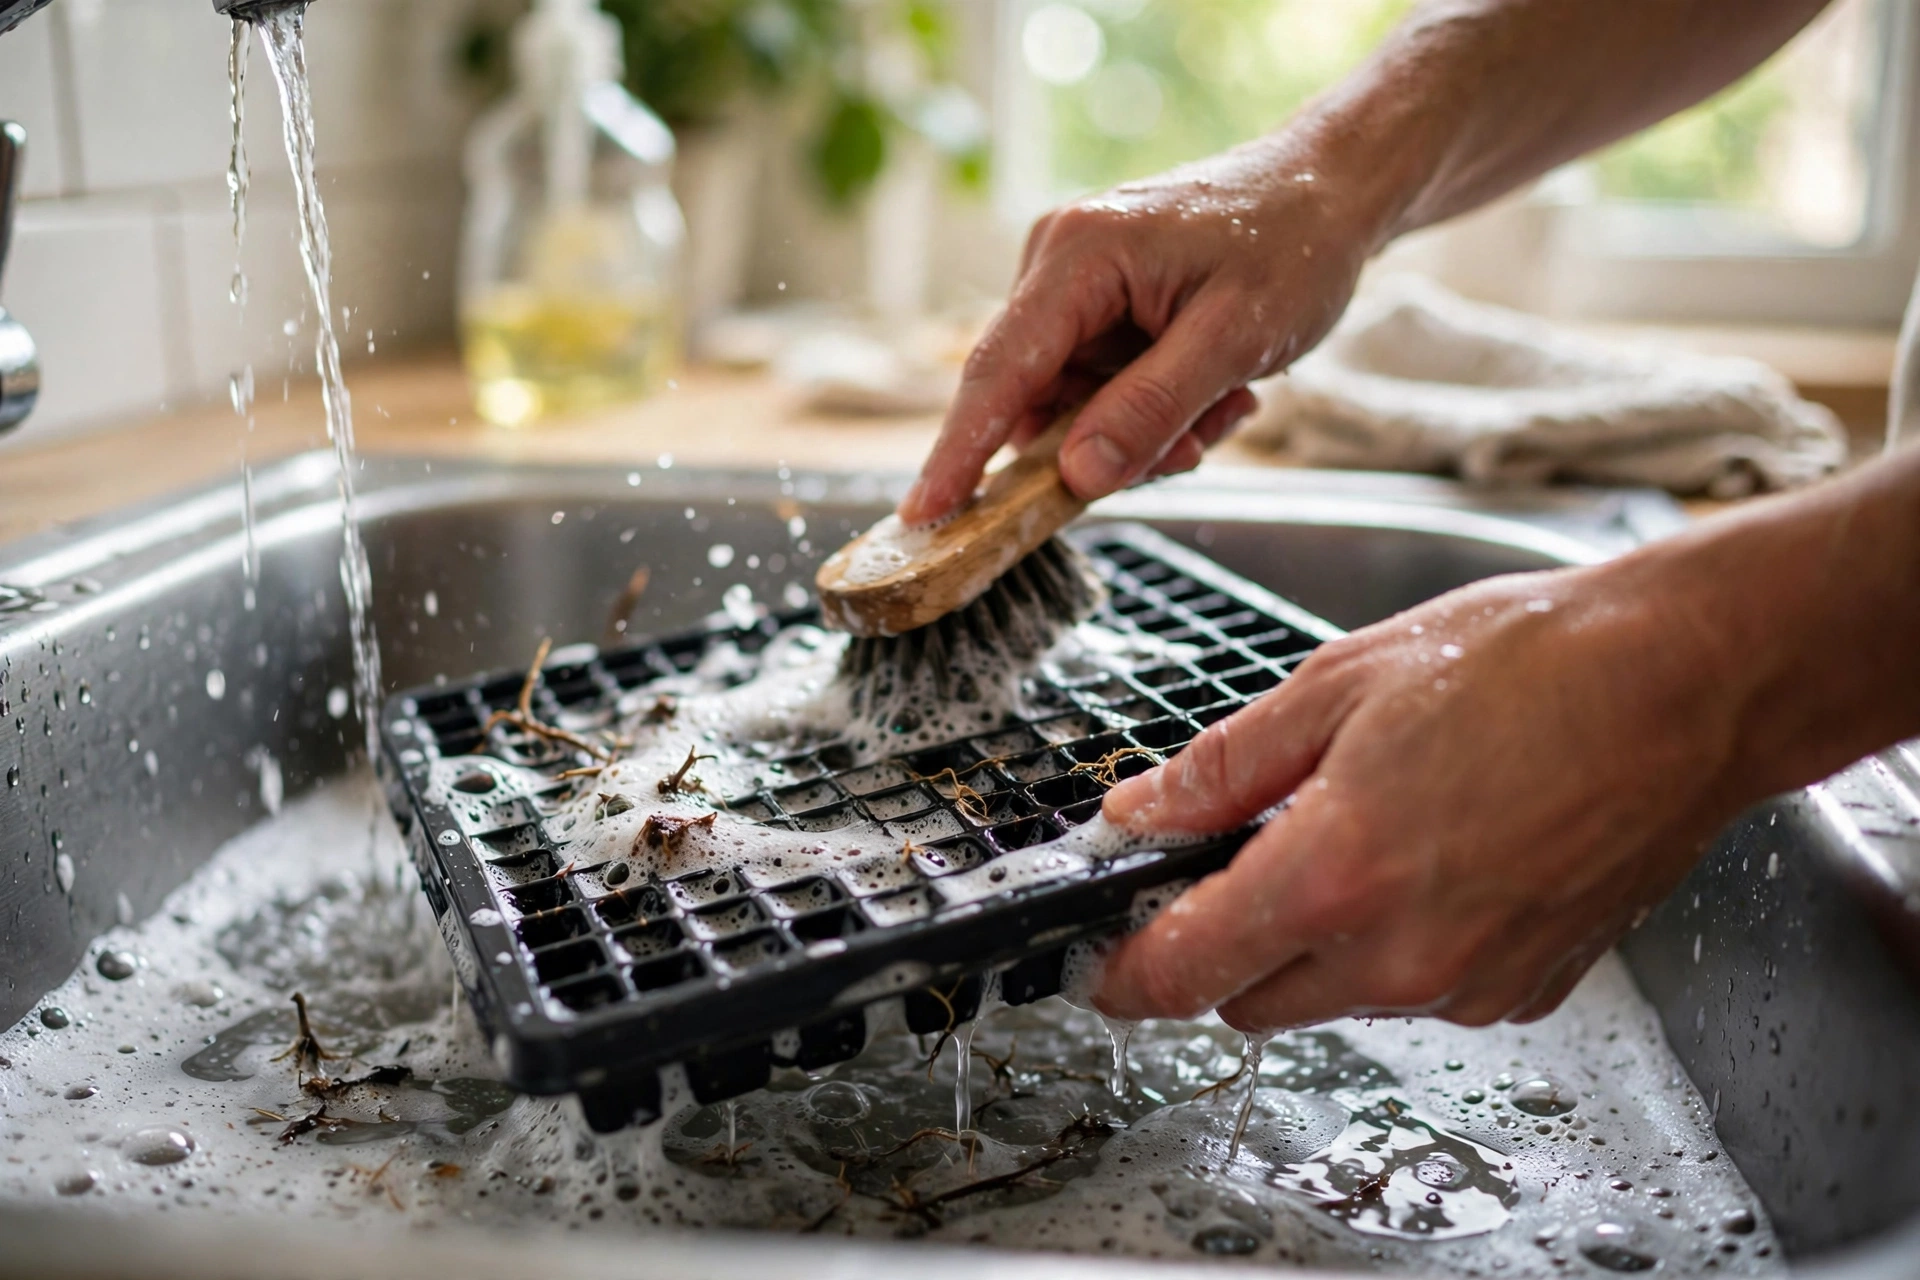
Compost the crop and the medium together. Then clean the tray like you mean it. Scrub it with hot soapy water and a brush, getting into the corners where old roots hide. Rinse it, sanitize it (the peroxide section below covers what extension sources back for this), and let it dry fully before it goes back on the shelf. A tray stored still damp hands the next crop a head start. Wash your hands and the work surface too. Then resow on fresh medium and run the prevention routine from the start.
The Prevention System
None of this needs special equipment. It is one short routine, run the same way on every tray. Growers who mold-proof the system stop chasing individual patches.

- Start clean. Wash and sanitize trays before sowing, not only after a bad crop. Let them dry fully.
- Fresh medium, every crop. Never resow into used medium, and never reuse medium from a moldy or damped-off tray.
- Weigh the seed. Sow at the rate for the crop and tray size. Even and thin beats thick and patchy.
- Moist, not soaked. Pre-moisten the medium until it feels like a wrung-out sponge. Mist to settle the seed, and nothing more.
- Water from below. After germination, pour water into the solid tray underneath and tip out whatever still stands after 10 to 15 minutes.
- Uncover on time. The cover comes off when the shoots lift it, usually day 2 to 4. Light and air start the same hour.
- Keep air moving. A small fan on low near the shelf, plus a little breathing room between trays.
- Store seed dry. Sealed, cool, and away from kitchen steam. Seed from an open bag left in a humid room is a risk you do not need.
That routine is the whole secret, and it pairs with the basic method in our complete guide to growing microgreens at home. The guide covers trays, medium, and harvest. This page covers the one problem that ruins trays. Run both, and mold becomes the rare tray instead of the regular one.
Hydrogen Peroxide: What Extension Actually Says
Peroxide attracts strong opinions in microgreen groups, so here is what the extension sources actually say, with no blog seasoning added. Purdue University Extension’s home microgreens guide lists one item in its supplies as optional: a diluted hydrogen peroxide or baking soda solution, to deter mold. Read that wording closely. Optional. A deterrent. Something that makes mold less likely on a healthy tray, not a cure for a moldy one.
An expert answer from Michigan State University on Ask Extension lands in the same place. A dilute hydrogen peroxide solution is considered safe when applied correctly, and the greens must be washed thoroughly before eating, to remove any residue. The same answer puts the real prevention first: clean containers, clean media, and proper airflow.
Now the two myths to drop. Peroxide is not a test. No fizz or fade tells you whether white growth is mold or root hairs, and no spray makes a doubtful tray provably safe to eat. And peroxide is not a rescue. Spraying a moldy tray and eating the crop anyway is the one move this page exists to talk you out of. Skip the peroxide and vinegar mixes circulating on grower blogs as well. Extension sources back peroxide for sanitizing trays and as an optional early deterrent. Nothing more.
When Mold Keeps Coming Back
One moldy tray is an accident. Three in a row is a system problem, and the fix is to change one variable at a time until the pattern breaks.
- The seed lot. If every failing tray came from the same bag, suspect the seed. Try a fresh bag before you blame your shelf.
- The medium bag. Medium stored open in a damp garage loads every tray with spores. Open a fresh bag and keep it sealed and dry.
- The room. Summer humidity and heat mats both push trays toward mold. Move the shelf, drop the mat, or run the fan longer.
- The trays themselves. Trays scrubbed clean but stored nested and damp re-contaminate each other. Dry them fully and store them apart.
If a full reset still molds, fresh seed, fresh medium, sanitized trays, change the crop for one round. A fast brassica on a clean system rebuilds your confidence quickly. Then bring the problem crop back and watch which variable travels with it.
Frequently Asked Questions
Is it safe to eat microgreens with a little mold?
No. Discard the whole tray. Mold spreads through the shared root mat and water long before the patch you can see, and microgreens are eaten raw, so no cooking step makes them safe. Washing does not rescue a moldy tray either. Compost the crop and the medium, sanitize the tray, and resow. Seed is cheap.
How can I tell root hairs from mold?
Root hairs grow on the roots only, look fine and even, and seem to vanish when misted. Mold grows across the medium and seed hulls too, looks webby or gray, stays put after misting, and can smell musty. The full side-by-side diagnostic is in our radish microgreens guide. When you cannot tell with confidence, discard the tray.
What does mold on microgreens look like?
Look for webby, cottony patches spreading across the surface of the medium, over seed hulls, and up the stems. The growth often turns gray at the edges and may smell musty or sour. It starts in the wettest, stillest corner of the tray, usually where seed landed thick. Fine, even fuzz that hugs the roots only is root hairs, not mold.
Can I cut off the moldy part and eat the rest?
No. The visible patch is only the part you can see. The growth runs through the shared medium and root mat, and the whole tray drinks the same water. Trimming has its place on food that gets cooked. On a crop eaten raw, the safe move is the whole tray in the compost and a clean resow.
Does hydrogen peroxide kill mold on microgreens?
Extension sources give it a narrow job. Purdue Extension lists diluted peroxide as an optional deterrent, and a Michigan State University expert answer calls a dilute solution safe when applied correctly, with greens washed thoroughly before eating. That is prevention and sanitizing, not a cure. Peroxide does not make a moldy tray safe to eat, and it is not a test for telling mold from root hairs.
Why do my microgreens keep getting mold?
Recurring mold is a system problem, not bad luck. Work the short list: the same seed lot in every failing tray, medium stored open and damp, trays put away wet, or a hot humid room with no fan. Change one variable at a time. A full reset with fresh seed, fresh medium, and sanitized trays breaks almost every streak.
Can I reuse the tray and medium after a moldy crop?
The tray, yes. The medium, no. Compost the crop and medium together, then scrub the tray with hot soapy water, sanitize it, and let it dry completely before sowing again. Used medium goes out even after a healthy crop. Reusing it is one of the most common reasons mold shows up tray after tray.
Does a fan really help prevent mold?
Yes, and it is the cheapest fix on this page. Moving air breaks up the warm, humid pocket that sits over a covered or crowded tray, and that pocket is where mold starts. A small fan on low near the shelf is enough. As a bonus, seedlings grown in moving air stand firmer and flop less.
Sources and Further Reading
- Purdue University Extension, “Grow Microgreens at Home.” Root hairs emerging from the seed are normal and mold is not; diluted hydrogen peroxide or baking soda solution listed as an optional supply to deter mold; sanitation stressed from start to finish.
- Ask Extension, Michigan State University, expert answer on hydrogen peroxide use in growing microgreens (2021). A dilute solution is considered safe when applied correctly; wash greens thoroughly before consumption; clean containers, media, and airflow prevent mold.
- Penn State Extension, “Ensuring Food Safety in Microgreens Production.” Sanitation and safe handling guidance for a crop that is eaten raw.



5 Comments