
How to Grow Microgreens at Home: A Beginner’s Guide
You don’t need a garden bed—or even a sunny patio—to grow a fresh crop of greens. A shallow tray on a kitchen shelf can be enough for your first batch of microgreens. The trick is to get three things right: even sowing, steady moisture, and enough light after germination.
Most microgreens are ready in about 7 to 21 days, depending on the crop and growing conditions. This guide walks you through a simple tray setup, shows you how much seed to start with, and explains what to do when seedlings look stretched, the tray stays soggy, or you spot possible mold.
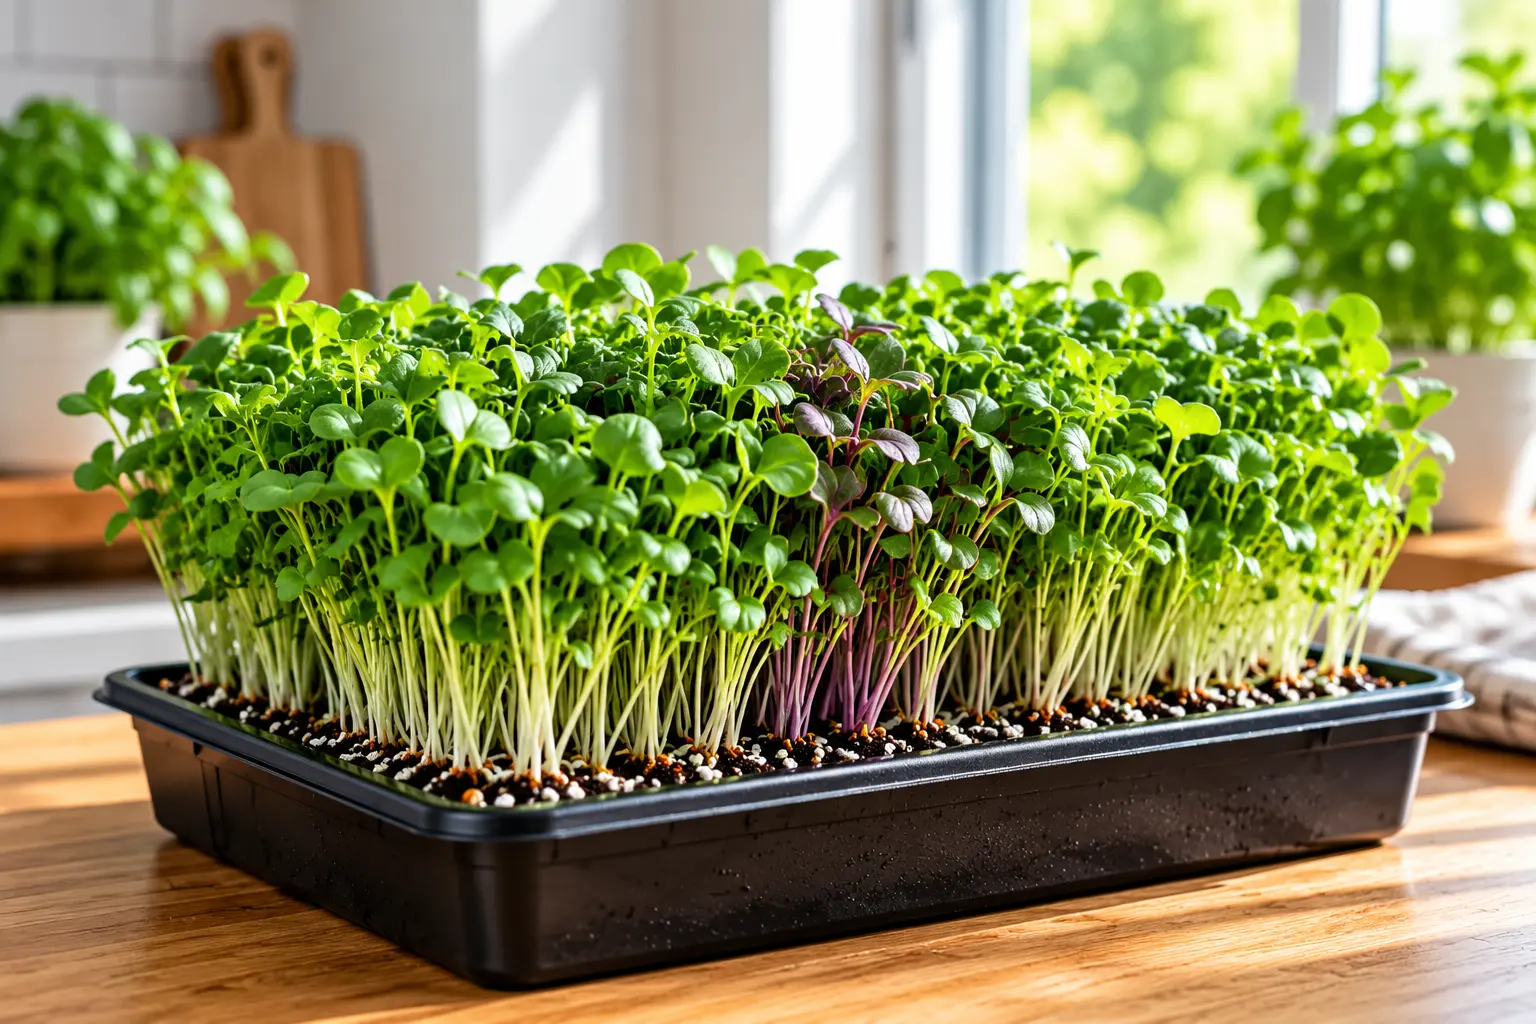
Quick Start: Your First Tray of Microgreens
- Choose: Radish, broccoli, or mustard microgreen seeds.
- Use: A clean, shallow food-safe tray and lightweight soilless growing mix.
- Sow: Spread seeds evenly across the damp surface, following the supplier’s instructions.
- Germinate: Cover the tray temporarily and check it daily to keep the mix moist, not soaked.
- Grow: Uncover seedlings after germination and provide strong light with good airflow.
- Harvest: Use clean scissors when the seedlings reach the right stage for their variety.
What Are Microgreens?
Microgreens are young edible seedlings harvested after their seed leaves appear and as their first true leaves begin to develop. You cut and eat the tender stems and leaves while the plants are still small.
They differ from sprouts, which people usually eat at an earlier stage and often grow without a layer of growing medium. Microgreens also differ from baby greens, which grow longer and develop more leaves before harvest.
For home growers, microgreens offer a quick crop that needs little space. The exact growing time and yield depend on the variety and conditions.
Which Microgreens Should Beginners Grow First?
Start with one variety rather than mixing several kinds in your first tray. Different seeds can germinate and mature at different rates, making watering and harvest timing harder to manage.
- Radish: A useful first choice with a peppery flavor.
- Broccoli: A milder option for salads and sandwiches.
- Mustard: A quick-growing choice with a sharper taste.
- Peas or sunflower: Larger seeds that may benefit from soaking before sowing. Follow the supplier’s instructions.
Choose seeds sold for edible microgreens or food use from a reputable supplier. Avoid treated garden seed that is not intended to be eaten. Small seeds such as broccoli and radish usually do not need soaking, while some larger seeds do.
Pea is the crop that breaks the usual rules, so it gets its own pea microgreens guide. For a slow, magenta-stemmed contrast to those fast crops, beet microgreens take 10 to 20 days to reach the scissors but reward you with earthy color in the tray. Kale rewards a little patience, and our kale microgreens guide covers the Red Russian trial, from seed rate to cut. Cilantro is the slowest of the bunch, taking 16 to 28 days to reach the scissors, and our cilantro microgreens guide covers the split seed and the long blackout.
What You Need to Grow Microgreens at Home
- Seeds: Start with one variety and check the packet for sowing guidance.
- Shallow tray: A clean food-safe container works well. A tray with drainage holes nested inside a solid tray makes watering easier to control.
- Growing medium: Use a lightweight seed-starting mix or soilless potting mix. Avoid dense garden soil in shallow indoor trays.
- Water: Clean drinking-quality water is suitable for routine watering.
- Light: A bright window may work, but a grow light can provide more consistent results.
- Scissors: Use clean, sharp scissors for harvesting.
You do not need a large pot or a special indoor garden system. If you reuse a food container, make sure it is clean, food-safe, and has suitable drainage or can sit in a separate drainage tray.
A useful starting point: For a standard 10 × 20-inch tray, University of Maryland Extension gives about 1 tablespoon (roughly 10–15 grams) as a general sowing example. Seed size changes the coverage, so treat this as a starting estimate—not a universal rate. For a smaller tray, scale down and follow the seed supplier’s directions where available. See the University of Maryland Extension growing guide for crop-specific examples.
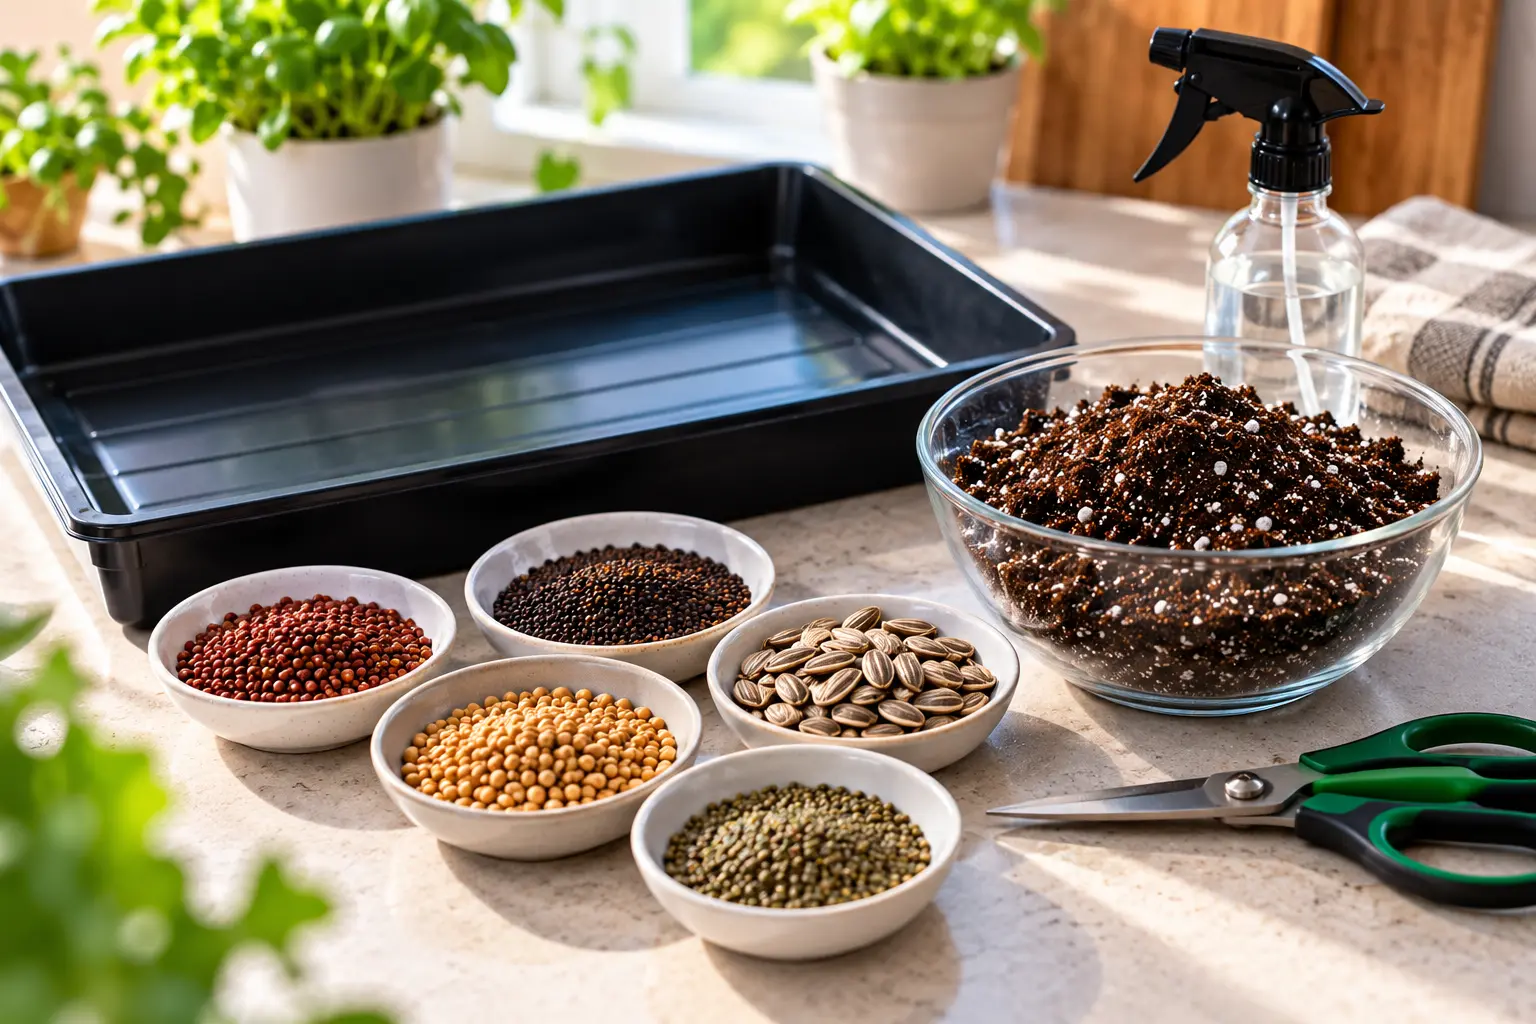
How to Grow Microgreens at Home: Step by Step
Step 1: Clean the Tray and Prepare the Growing Medium
Wash the tray and rinse away any soap residue. Remove old roots and debris if you are reusing equipment. Fill the tray with about 1 to 1½ inches of pre-moistened growing medium, or follow the instructions for your chosen growing mat.
The mix should feel evenly damp without standing water. Level the surface gently so the seeds make consistent contact with the medium. You do not need to add fertilizer for a short microgreen crop; the seed supplies much of the nutrition the seedling needs at this stage.
Step 2: Sow the Seeds Evenly
Scatter the seeds across the surface to create a fairly dense, even layer. Microgreens are sown more closely than plants that will grow to maturity, but avoid piling seeds into thick clumps. Spread them across the tray instead of leaving large bare patches or heaps of seed in one spot.
Use the seed supplier’s sowing rate when it provides one. Seed size varies, so a single tablespoon amount will not suit every variety or tray. Press the seeds gently against the medium to help them make contact. Cover them with a thin layer only if the crop’s instructions call for it.

Step 3: Cover the Tray While the Seeds Germinate
Place a second tray or suitable cover over the planted tray to hold in moisture. Keep it in a comfortably warm indoor spot and check it daily. The goal is to stop the surface from drying out—not to leave the seeds sitting in water.
Some seeds sprout within a few days; others take longer. Follow the seed packet where possible. If the surface begins to dry, mist lightly rather than soaking the tray.

Step 4: Remove the Cover and Provide Strong Light
Once most seeds have germinated and the seedlings begin to lift the cover, uncover the tray and move it into strong light. A sunny window can work, but seedlings may stretch toward the window if the light is weak or comes from one direction. A suitable LED grow light can make indoor growing more consistent.
Many indoor setups aim for about 16 hours of light a day. The right distance depends on your fixture, so follow its instructions rather than guessing. The University of Maryland Extension guide gives more detail on lighting and crop care. Watch the seedlings too: long, pale, leaning stems can mean the light is too weak or uneven.
Step 5: Water Carefully and Keep Air Moving
Keep the growing medium moist, not saturated. After germination, bottom watering can help: pour a little water into the solid tray beneath the growing tray and let the medium absorb it through the drainage holes. Tip out excess water instead of leaving the roots in a pool.
If you water from above, use a gentle stream so you do not flatten the seedlings. Give the tray some air circulation and avoid trapping it under a humid cover once the plants have sprouted. Excess moisture, stagnant air, and dense growth can encourage mold and other problems.
Step 6: Check the Crop Each Day
Look at the medium, leaves, and stems rather than watering on a fixed schedule. A warm, sunny room can dry a tray faster than a cool room. If the medium still feels damp, you may not need to water yet.
Watch for healthy, upright seedlings and fresh growth. If you see spreading fuzzy growth, an unpleasant smell, or signs of decay, do not eat the affected crop. Discard it, clean the tray thoroughly, and review your watering, seed density, and airflow before starting again.
Step 7: Harvest at the Right Stage
Many microgreens are ready roughly 7 to 21 days after sowing, but the timing depends on the variety, temperature, light, and your preferred size. Harvest when the seed leaves are open and the first true leaves begin to develop, unless the variety’s guidance recommends a different stage.
Use clean, sharp scissors to cut the stems just above the growing medium. Keep the blades out of the mix to reduce the amount of growing medium that gets onto the harvest. Most microgreens are grown for one cut, so plan to sow a fresh tray rather than expecting the same plants to produce another full crop.
How Long Do Microgreens Take to Grow?
There is no single harvest day for every crop. Many microgreens take about 7 to 21 days from sowing to harvest. Radish and some cabbage-family crops can be relatively quick, while slower crops may need longer.
Use the seed supplier’s guidance as a starting point and judge the plants by their growth stage as well as the calendar. Keep a simple note of the variety, sowing date, first sprout date, watering pattern, and harvest date. That record helps you improve your next tray without guessing.
Common Microgreens Problems and How to Fix Them
White Fuzz Around the Roots
Fine root hairs can look like fuzz and may appear close to the roots as seedlings develop. Mold may spread across seed husks or the growing medium and can come with a musty smell or signs of decay. If you cannot confidently tell the difference, discard the crop rather than eating it.
For the full prevention system, see why microgreens get moldy and how to prevent it.
Seeds Are Not Germinating Evenly
Possible causes include old or unsuitable seed, uneven sowing, dry patches, waterlogged medium, or temperatures outside the crop’s preferred range. Check the seed instructions, distribute seeds more evenly, and keep moisture consistent without flooding the tray.
Seedlings Are Tall, Thin, or Leaning
Weak or one-sided light is a common reason for stretched growth. Move the tray into stronger, more even light or use a grow light at the recommended distance. Rotate the tray if the window is the main light source.
The Tray Smells Unpleasant or Stays Soggy
Too much water and poor airflow can leave the growing medium saturated. Empty standing water, improve air circulation, and avoid leaving the cover on after germination. If the crop shows mold or decay, discard it rather than trying to rescue it for food.
The Seedlings Look Yellow or Grow Slowly
Check the light first, then review temperature and moisture. A tray that stays too wet can struggle just as a tray that dries out can. Change one condition at a time so you can identify what improves the next batch.
How to Harvest, Wash, and Store Microgreens
Wash your hands and use clean scissors and a clean surface before harvesting. Cut just above the growing medium, then rinse the greens under clean running water and pat them dry. For the best texture, use them soon after cutting.
University of Maryland Extension advises refrigerating harvested microgreens for up to 10 days. Actual storage life depends on how fresh and dry the greens are when stored. Refrigerate them promptly in a clean container and discard greens that smell off, feel slimy, or show signs of mold. Washing is not a way to make spoiled produce safe.
After harvest, remove the roots and used medium, then wash the tray before reusing it. Start the next crop with clean equipment and fresh growing medium.
How to Use Your First Harvest
Add microgreens to sandwiches, wraps, salads, grain bowls, omelets, or soups after cooking. Their flavor varies by crop: radish and mustard can taste peppery, while broccoli tends to be milder. Start with a small handful and see which varieties you like best.
Frequently Asked Questions
Can I grow microgreens on a windowsill?
Yes. A bright windowsill may provide enough light for some varieties, but results depend on the season and window exposure. If seedlings become pale, thin, or strongly bent toward the glass, add stronger or more even light.
Do microgreens need soil?
No. You can grow them in a lightweight soilless mix or on a suitable growing mat. A shallow layer of medium helps support roots and manage moisture, but ordinary garden soil is usually too dense for an indoor tray.
Should I soak microgreen seeds before planting?
Only some types benefit from soaking. Larger seeds such as peas and sunflower are commonly soaked before sowing, while small seeds such as radish and broccoli usually do not need it. Follow the seed supplier’s directions for the variety you choose.
How often should I water microgreens?
Check the growing medium daily and water when it begins to dry. The right frequency depends on room temperature, airflow, light, tray size, and the medium. Aim for evenly moist mix, not standing water or soggy roots.
Why are my microgreens moldy?
Excess moisture, crowded seed patches, poor airflow, and a cover left on too long can contribute to mold. Discard a crop with spreading mold, decay, or an unpleasant smell. Clean the equipment and reduce excess moisture before trying again. See why microgreens get moldy and how to prevent it.
Can microgreens regrow after cutting?
Most microgreens are grown for a single harvest. After cutting, remove the used medium and roots, wash the tray, and sow a new batch rather than relying on regrowth.
Start Small, Then Improve Your Next Tray
Your first batch does not need a complicated setup. Choose one beginner-friendly crop, use a clean shallow tray, keep the medium damp rather than soaked, and provide strong light after germination. Note what worked and adjust the next sowing based on what you see.
If you want another edible crop for your kitchen, our guide to starting an indoor herb garden covers a longer-term setup. For a sunny windowsill, see our list of herbs that grow well on a windowsill. These plants need different care from microgreens, so use the guides for their specific growing requirements.
Growing beyond trays? Our guide to growing vegetables indoors covers the leafy and fruiting crops that follow microgreens.
Looking for more ways to use a compact growing area? Browse our small-space herb garden ideas for options beyond a single tray.
Trusted Growing Guides
- University of Maryland Extension: Growing Microgreens and Baby Greens Indoors — tray dimensions, approximate seed amounts, lighting, moisture, airflow, and harvest.
- Penn State Extension: A Step-By-Step Guide for Growing Microgreens at Home — supplies, growing media, and setup steps.
- Utah State University Extension: Grow Your Own Microgreens — crop options and home-growing guidance.


9 Comments